For those who’re searching for a straightforward solution to spruce up a dated hutch or drained built-in cupboard, look no additional than attempting peel and stick wallpaper on furnishings. Certain you might paint or a stain your piece, however peel and stick wallpaper is now past cool and this self-adhesive wall masking has no limits relating to including sample and design curiosity to an area.
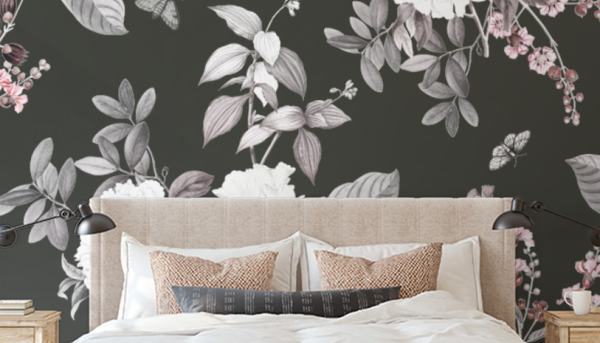
From putting in peel and stick floral wallpaper on bed room, lounge and even lavatory partitions, to utilizing it behind bookcases or in one other sort of wallpaper project, it is now a go-to for a lot of because it provides a seamless, fashionable end with minimal fuss, and, it is tremendous budget-friendly additionally.
Peel-and-stick wallpaper provides an affordable, DIY-friendly alternative to conventional wallcoverings. The self-adhesive backing does not require any messy paste, and in case you make a mistake whereas making use of, you possibly can pull it off and begin over. Nevertheless, putting in short-term wallpaper is not so simple as peeling off the backing and sticking it to the wall. You may must do some prep work to make sure it adheres correctly to the wall. A number of instruments and tips may even turn out to be useful that can assist you get the smoothest end potential. Observe these step-by-step directions on the way to apply peel-and-stick wallpaper to realize bubble-free, long-lasting outcomes.
The right way to Hold Peel-and-Stick Wallpaper
Earlier than you start, be aware that peel-and-stick wallpaper usually adheres greatest to partitions with a clean texture and an eggshell, satin, or semi-gloss finish. Test the wallpaper producer’s directions to make sure the product will stick with your sort of partitions.
To make sure you buy the correct quantity of detachable wallpaper, fastidiously measure the house, you intend to cowl. Purchase barely extra wallpaper than you assume you will must accommodate errors and tough areas corresponding to home windows, doorways, or tight nooks.
Provides Wanted
Sponge or fabric
Delicate cleaner
Measuring tape
Straightedge
Pencil
Peel-and-stick wallpaper
Plastic smoothing instrument
Utility knife
Step-by-Step Instructions
Observe these directions to use peel & stick wallpaper and rapidly add colour and sample to your house.
Step 1: Prep Partitions
Turn off the power to securely take away outlet covers and light-weight swap plates within the space you intend to cowl. Next, clean the wall’s surface by wiping it down with a humid sponge or fabric and a gentle, non-abrasive cleaner. Wait not less than 24 hours to permit the floor to dry utterly. Some short-term wallpaper also needs to be acclimated to the room’s local weather; verify the producer’s directions.
Step 2: Make a Information for Your First Piece
Measure the width of your peel-and-stick wallpaper ($34, Target), then switch that measurement to your wall with a pencil. Use a straightedge and stage to attract a line from ceiling to baseboard (or the realm you are masking) in step with your marks. This information will show you how to apply the primary strip of wallpaper in a straight line.
Step 3: Apply Peel-and-Stick Wallpaper
Peel off about 12 inches of the adhesive backing and line the wallpaper up together with your strains, ranging from the best level you will be wallpapering. Transferring from high to backside, press and clean the wallpaper in opposition to the wall whereas peeling off the remaining backing. Utilizing downward strokes, run a plastic smoothing tool ($8, The Home Depot) alongside the wall to take away air bubbles. As soon as your entire piece has adhered to the wall, use your straightedge and a small utility knife to fastidiously minimize alongside the baseboard and take away any extra.
Step 4: Match Patterns and Repeat
When making use of subsequent items, line up the wallpaper’s sample to make sure a seamless look. Overlap the second piece barely with the primary and run the smoothing instrument alongside the seam to make it lay as flat as potential. Trim on the backside as wanted and repeat to cowl your entire floor.
Step 5: Work Round Home windows and Shops
Whenever you attain a window, door body, or outlet, let the wallpaper overlap it. As soon as the piece is utilized, use a straightedge and utility knife to trim and take away the surplus. Subsequent, clean the paper in opposition to the wall round all sides of the outlet or window. Guarantee the facility continues to be turned off for electrical shops and swap plates, and use a utility knife to fastidiously minimize away the paper over the opening. Don’t be concerned about tough edges across the gap; the outlet cowl or swap plate will disguise most imperfections. You too can apply paper to flat plates for a seamless look.
Step 6: Test for Air Bubbles
If any air bubbles stay, use the tip of your utility knife or a pin to create a small gap in the course of the bubble. Then, press all the way down to launch the air trapped inside and clean the wallpaper.